Halloween Cupcakes

Halloween is a great holiday for fun treats and desserts, with so many creative possibilities. (I made these Eyeball Cupcakes a few years ago.) This year, I decided to make a whole bunch of Halloween cupcakes all at once — I’ve had pictures of these in my binder for a long time and I just wanted to finally make them. Here are the designs and instructions. Note: You may find it easiest to use a cake mix for the cupcakes, because the decorations are the focus. Chocolate cupcakes made from a devil’s food cake mix hold up well.
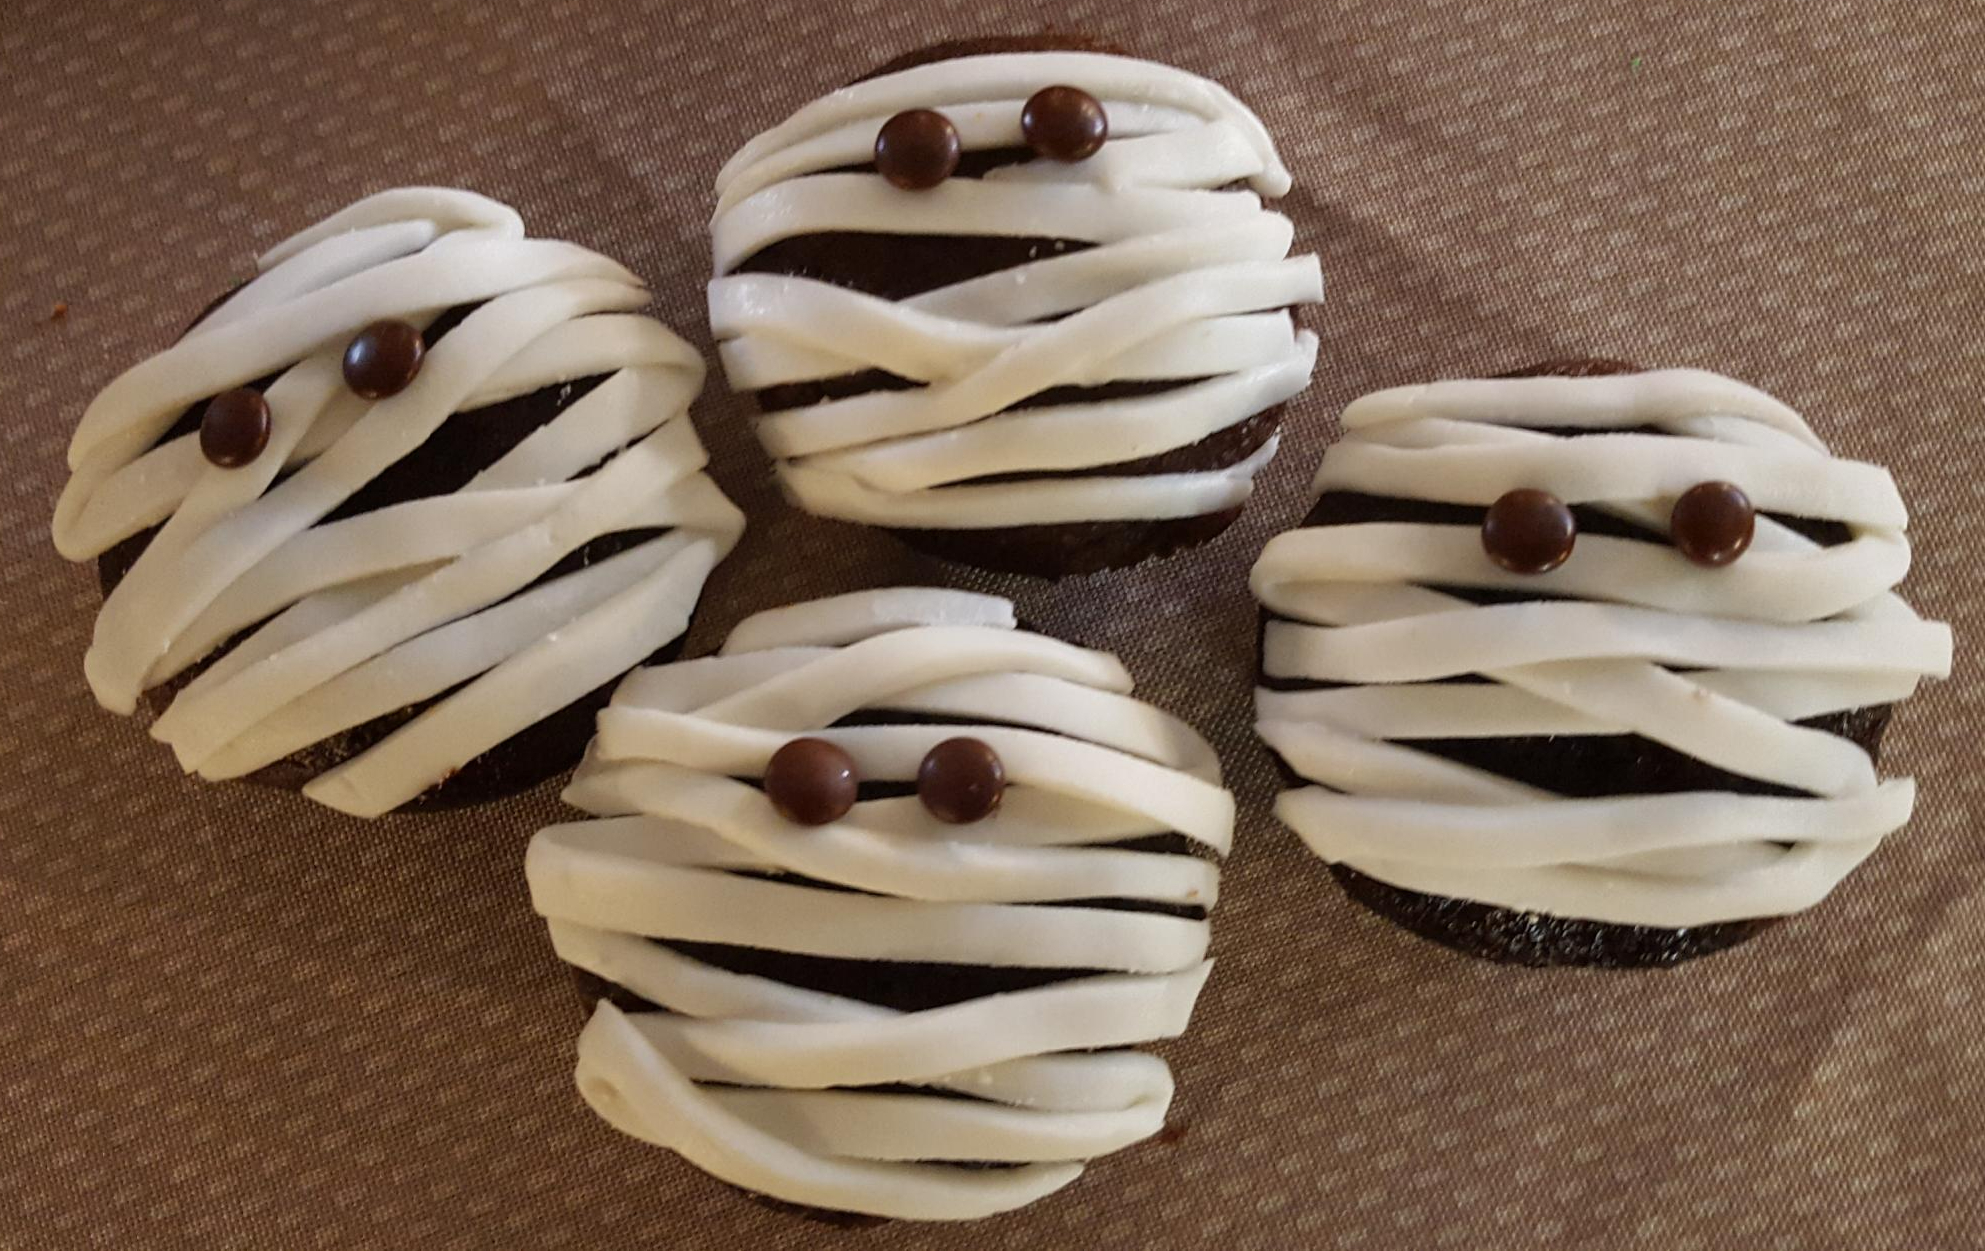
MUMMY CUPCAKES

You will need:
Chocolate cupcakes
White fondant (use a gourmet brand for the best taste)
Something for the eyes (I used mini chocolate morsels. Mini brown M&Ms would be good, or you could use candy eyeballs.)

Roll out the fondant until about 1/8 thick. Best to do this on a surface covered in confectioner’s sugar (icing sugar). Use a knife or pizza cutter to cut thin ribbons, then lay pieces of the ribbon across the cupcake. Attach the eyes. They won’t stick very well on their own, so use a dab of water or even frosting to fix them in place.

PUMPKIN CUPCAKES

You will need:
Vanilla cupcakes
Buttercream frosting
Orange food coloring
Orange sanding sugar
Pretzel sticks

After coloring the frosting, spread a nicely shaped mound of it on top of the cupcake. Cover with sanding sugar and press it lightly so it adheres. With the tip of a knife, draw lines extending from the center. Insert a pretzel stick into the middle.
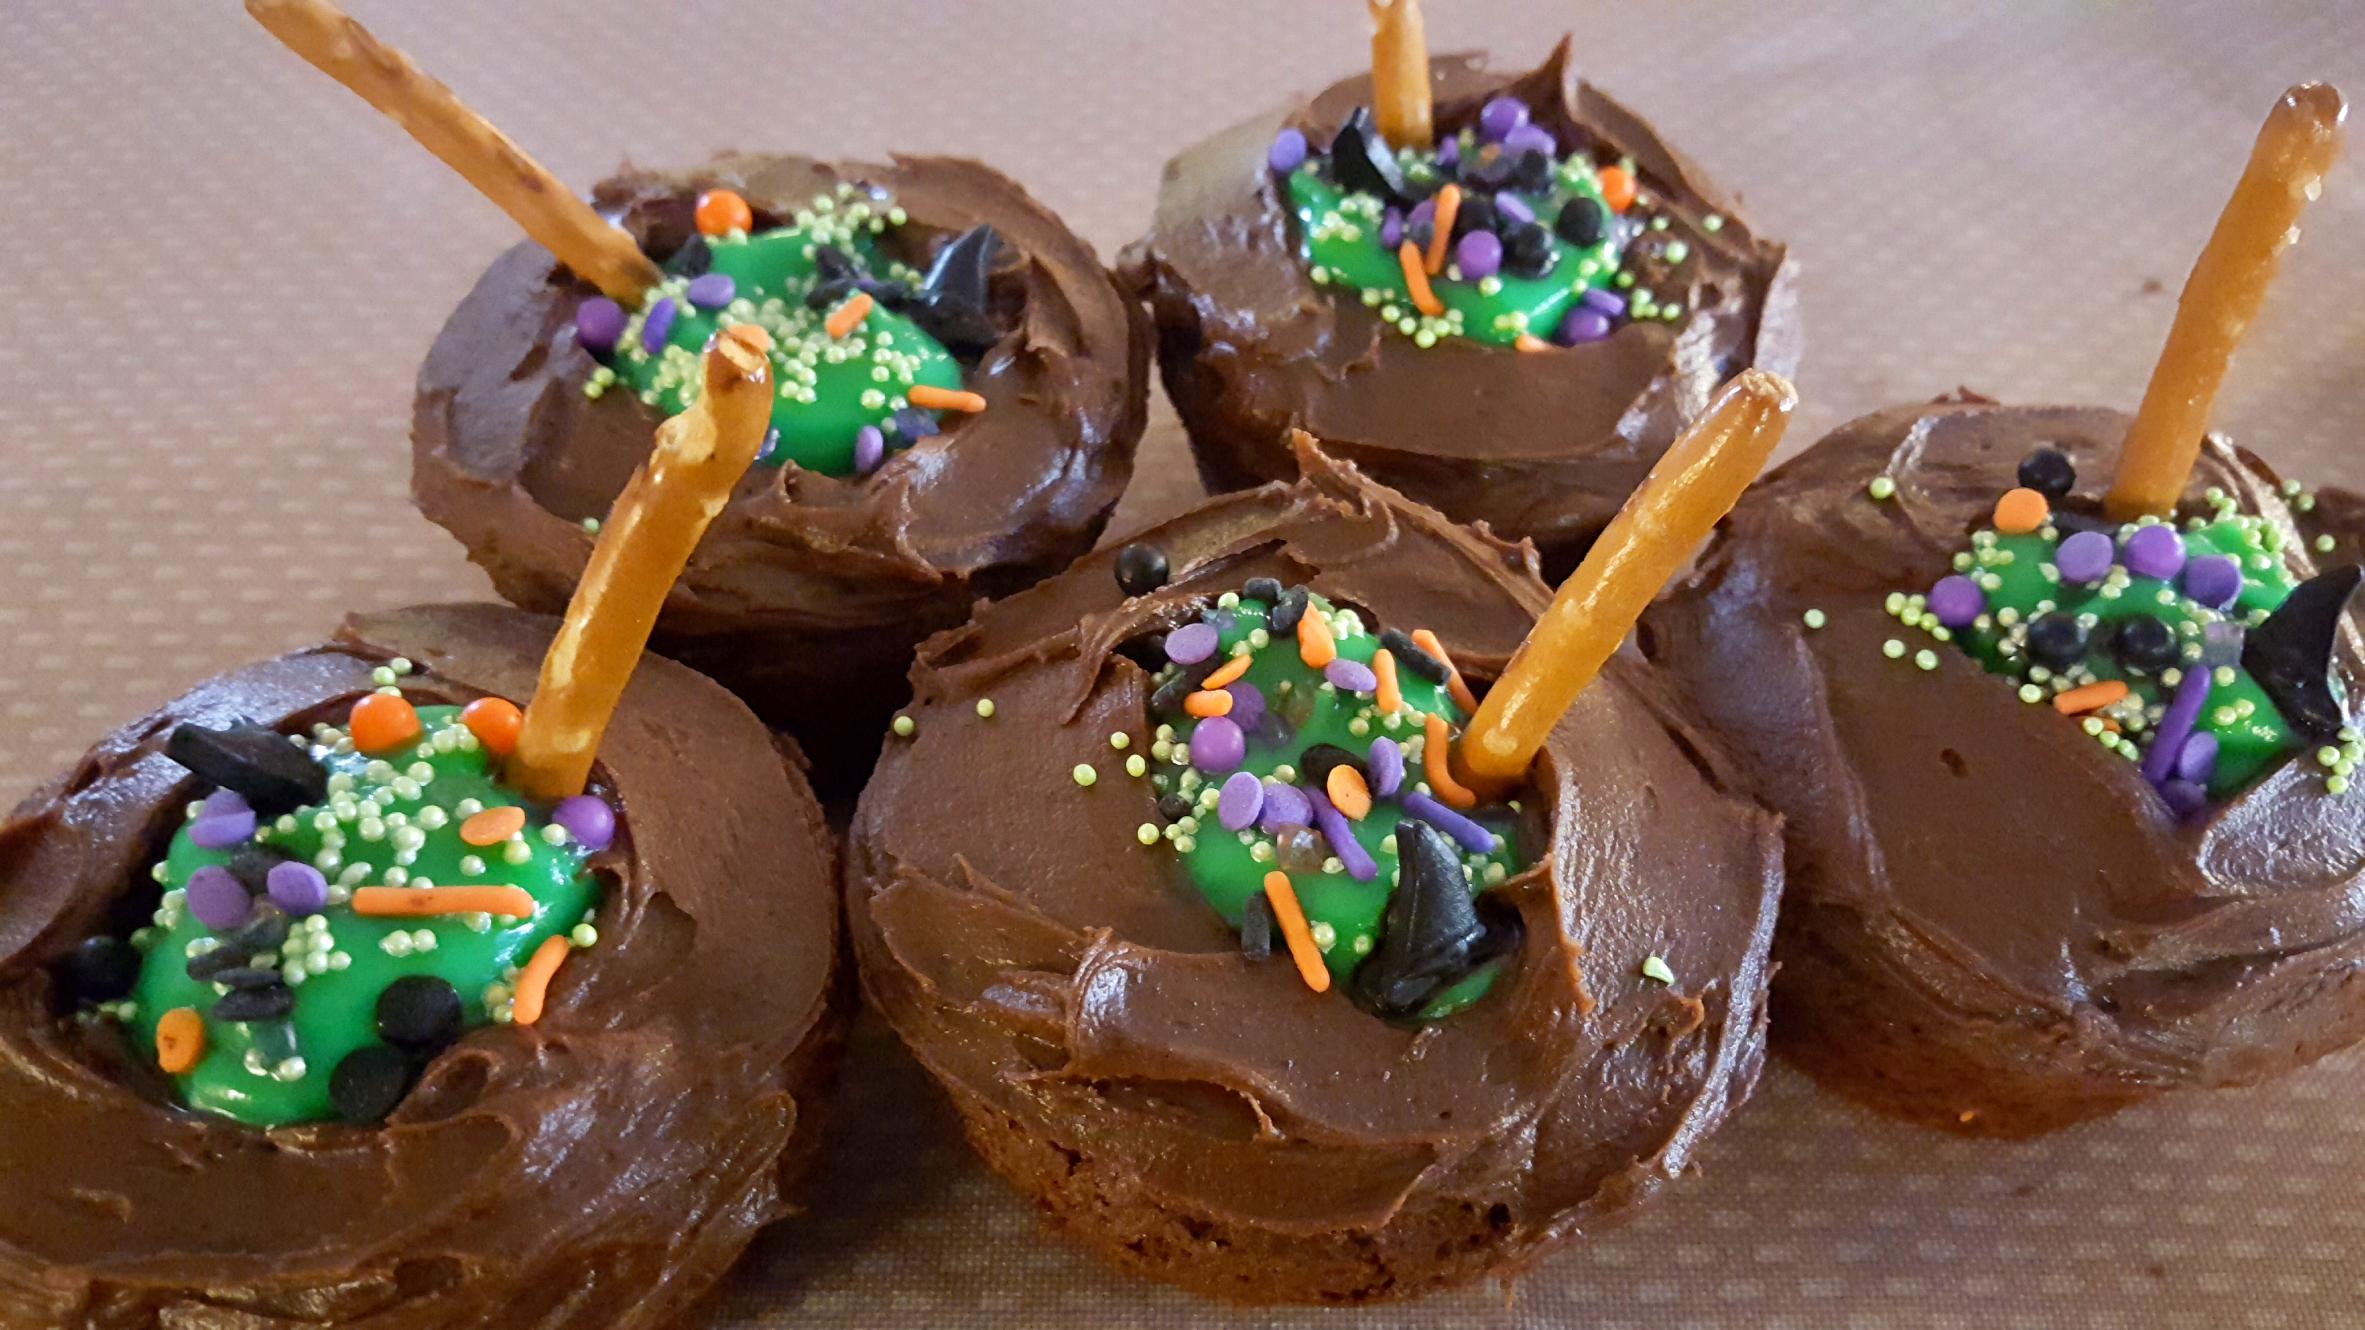
WITCHES’ CAULDRONS

You will need:
Chocolate cupcakes
Chocolate frosting
Vanilla pudding
Green food coloring
A mix of Halloween sprinkles
Pretzel sticks

Scoop out a portion in the middle of each cupcake. Don’t go too far down. Put the chocolate frosting around the hole and put a dab of it at the bottom of the hole (to help keep the pudding in place).

Make the vanilla pudding and color it green. Scoop it into the cupcake holes, then top with sprinkles. Insert a pretzel stick at an angle into the pudding. (If you’re not going to eat these right away, insert the pretzel sticks shortly before serving — otherwise they will get soggy.)

WHITE GHOST CUPCAKES

You will need:
Chocolate cupcakes
Chocolate frosting
White chocolate
Mini chocolate morsels

Line a baking sheet with parchment paper. Snip off a tiny corner of a plastic sandwich bag.

Melt white chocolate in the microwave (remove it as soon as it’s melted, or it will become too thick). Spoon it into the sandwich bag and pipe the outline of a ghost on the parchment, making one corner of the bottom of the ghost very long and narrow — this is what you will use to insert into the cupcakes. Fill in the outline with chocolate and smooth it out ever so gently with your finger or a knife. Quickly place two morsels on for eyes, then refrigerate until solid. Insert into frosted cupcakes.
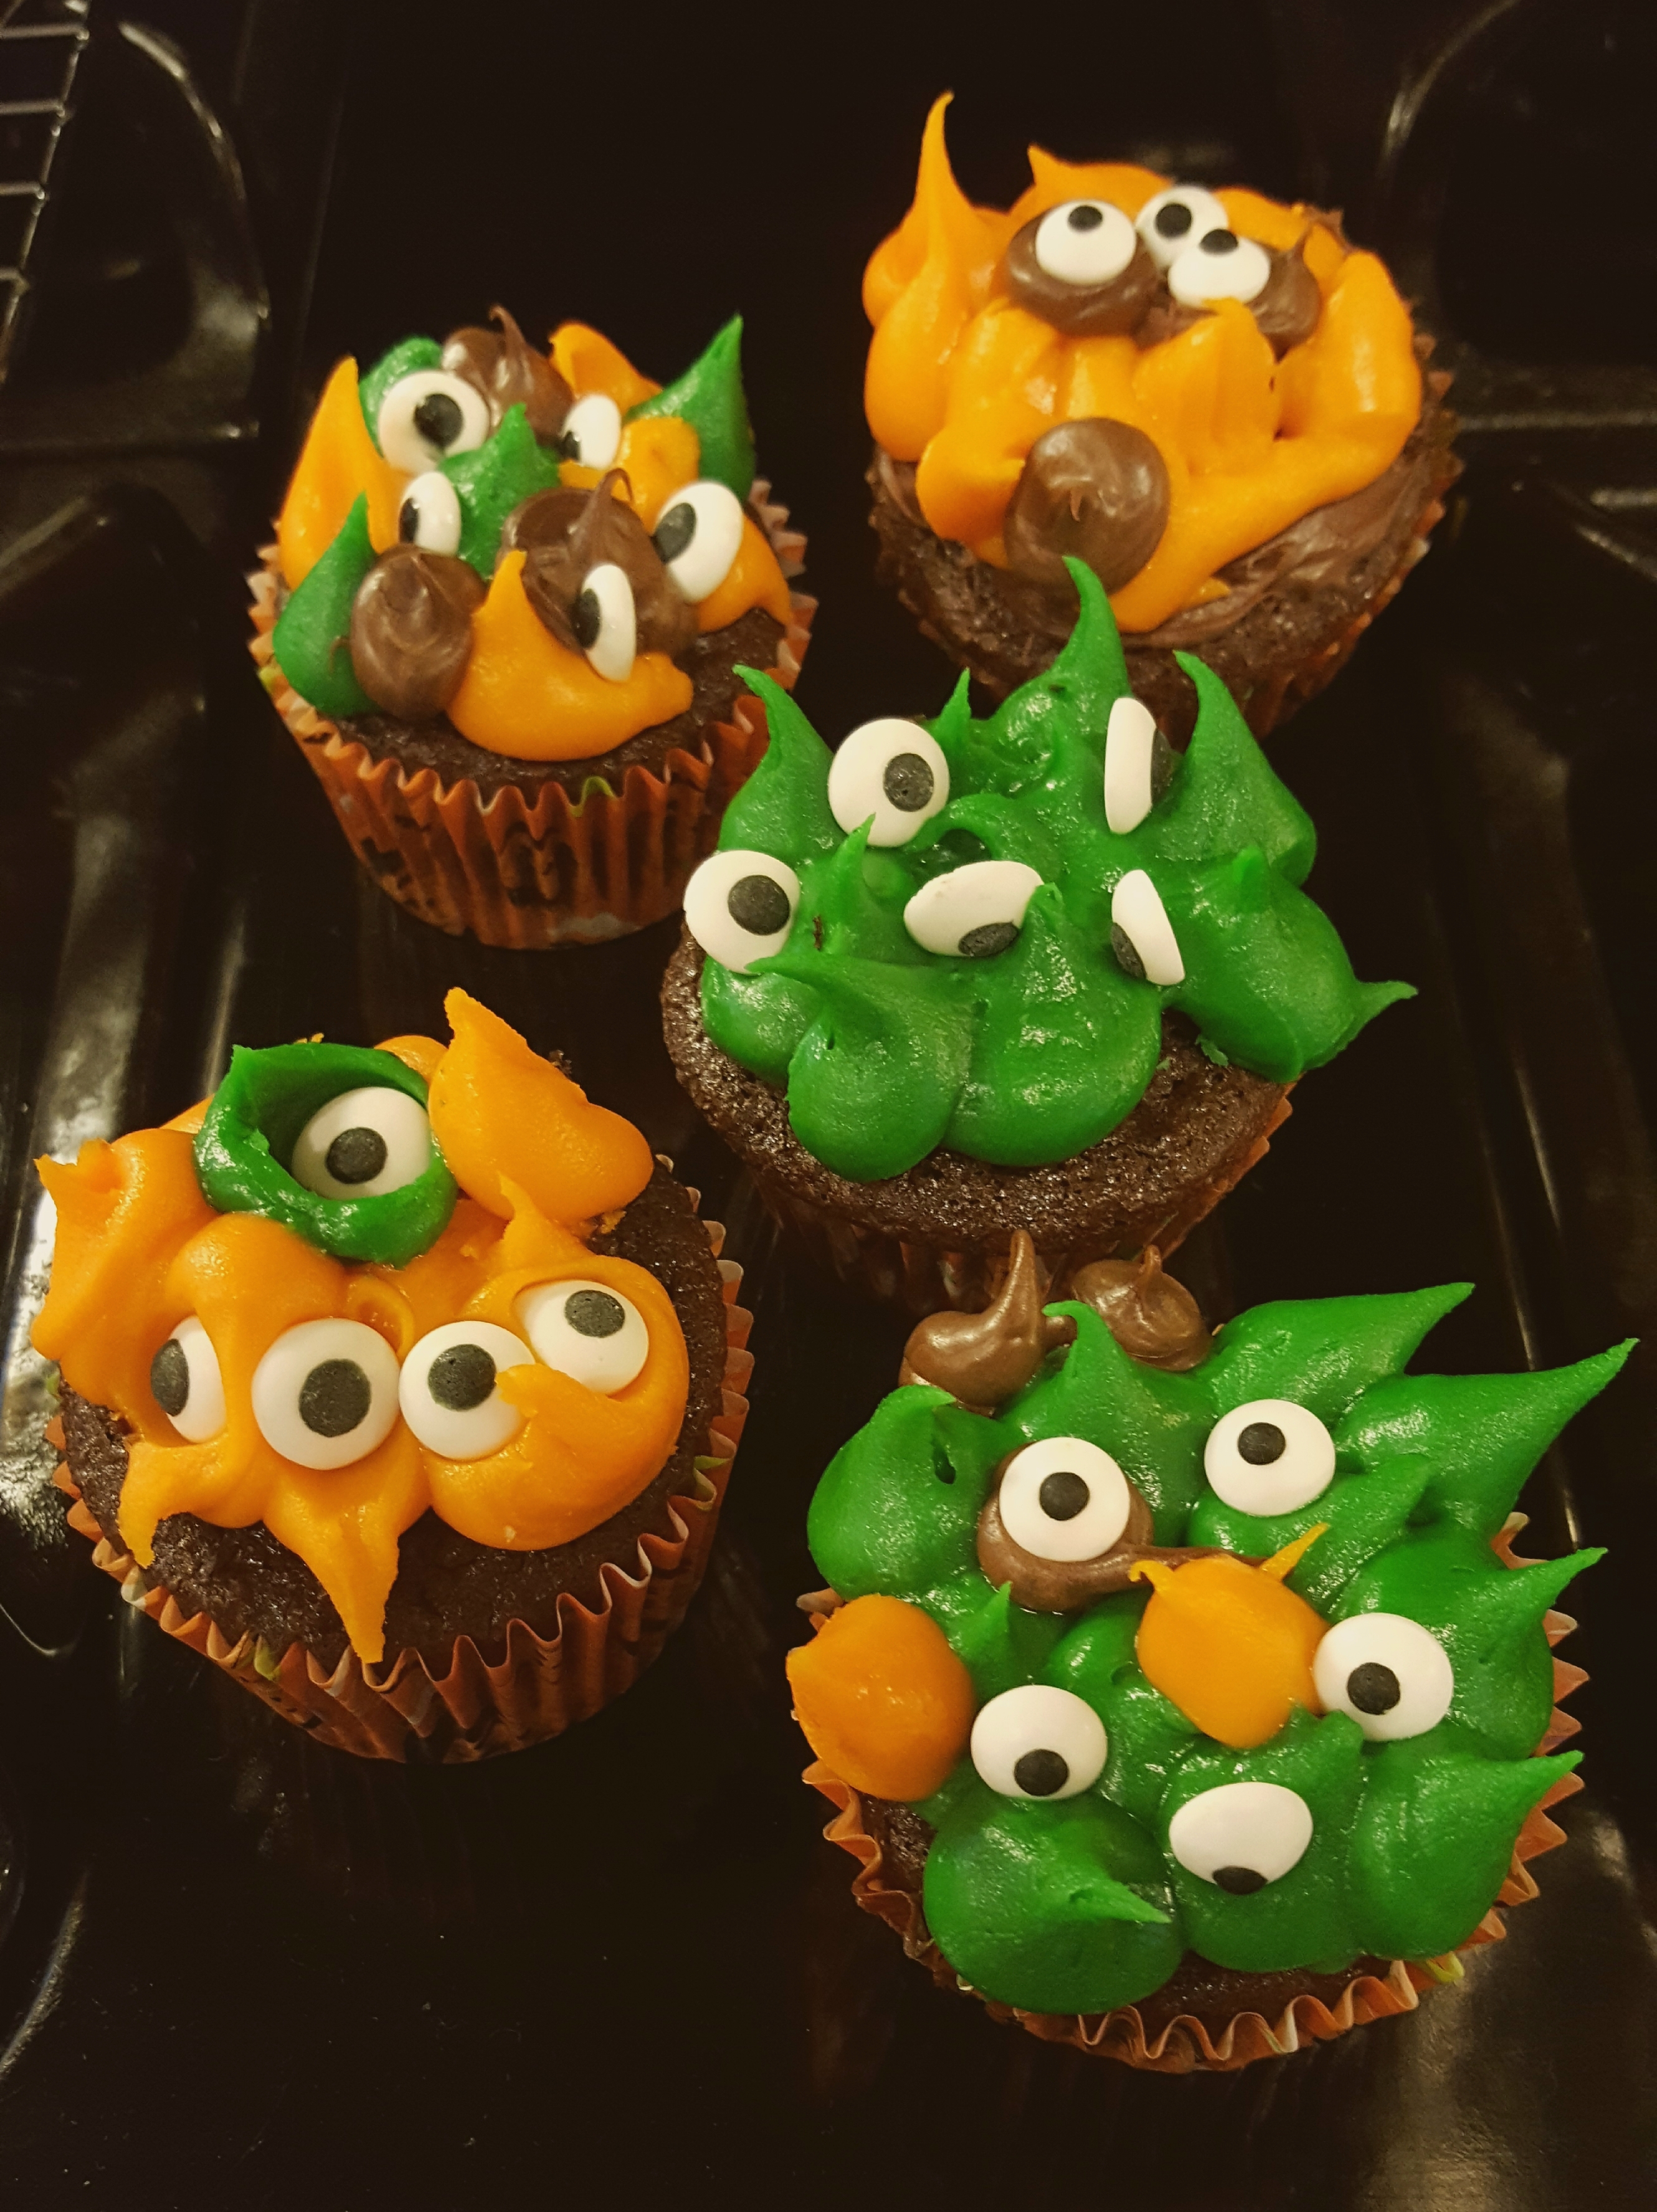
M&M MONSTERS

You will need:
Any kind of cupcakes
Buttercream frosting
A variety of food coloring — try green, purple, and orange
Brown, green, and orange M&Ms
Candy eyeballs

Color the frosting in a variety of colors and spread on the cupcakes. Decorate with M&Ms and candy eyeballs. You can see I did random designs as well as faces.

Note: You should store these at room temperature or make them just before serving, as the M&Ms will get a frosty look after spending time in the refrigerator.

The main thing with all of these cupcakes is to HAVE FUN and be creative.

Happy Halloween!

Halloween Eyeball Cupcakes

20181030_1539161. Bake some chocolate cupcakes with cupcake liners.
2. Prepare a thick buttercream frosting and tint it with Halloween colors like purple, orange, green, and brown.
3. Pipe spikes all over the top of the cupcake. (Squirt a small blob and bring the tip of the frosting bag straight back up.)
4. Put candy eyes randomly between the spikes.

As you can see, we didn’t just do spikes — we had fun making crazy monster faces. This is one Halloween treat that doesn’t require a specific shape or design, so just use your imagination!

Peach Cobbler

cobbler
The best way to enjoy peach cobbler is scooped in a bowl and topped with some vanilla ice cream. It ought to be golden brown on top, liberal with the fruit, and just mushy enough on the bottom to remind you this is comfort food best eaten with a spoon.

This recipe started with a version found on many websites that all credit The Salt Lick barbecue restaurant near Austin, Texas. I tried to do my own searching and couldn’t find the original, so I asked the restaurant — and it seems it’s not theirs, after all.

Now I don’t feel so bad about the tweaks I made. I slightly reduced the amount of butter and got specific about the peaches. The recipe calls for canned, but if you have a bounty of fresh peaches, by all means, use them instead.

One last thing — this is one baked dessert that doesn’t have to cool off before you serve it. Although you can make it ahead of time, this dish, even in the heat of summer, is best served warm.

FILLING
28 oz. peeled, sliced peaches (if using canned, weigh the peaches after draining — three 15-oz. cans should give the right amount)
1 cup sugar
1 tsp. cinnamon
1/2 tsp. nutmeg

BATTER
6 1/2 Tbsp. butter
1 cup flour
1 cup sugar
2 tsp. baking powder
1/4 tsp. salt
2/3 cup room-temperature milk
1 room-temperature egg

Heat oven to 350F degrees. Meanwhile, prepare the peaches. Peel them first, then cut slices into halves or thirds, depending on size. In a bowl, combine peaches with sugar and spices.

Once oven is hot, put butter in a 9×13-inch pan and melt in the oven. Remove once melted.

In a bowl, combine flour, sugar, baking powder, and salt. Stir in milk and egg. Pour evenly over melted butter.

Spread peach mixture, including any liquid, evenly over batter. Do not stir.

Bake 35-45 minutes until batter is golden brown.

Note: I have updated this post to include the restaurant’s reply to my question about the recipe’s origin.

Blueberry Buckle

20180503_081824.jpg

Buckle, coffeecake, or cobbler. No matter what you call it, this is a great showcase for fresh blueberries and a wonderful, easy cake to make for friends.

I clipped this from The Atlanta Journal-Constitution sometime in the 1990s. It was called “Blueberry Thing” which, if I remember, was because the person profiled in the accompanying article had always called it that and because it tasted good no matter the name. I wrote “coffeecake” next to the recipe.

I found a similar Blueberry Thing online recently, so the Thing must be a thing.

Officially, this is not a cobbler. I learned that from a helpful if not tiny bit snobbish article that explained the differences between cobblers, pandowdies, crisps, buckles, and slumps. (I know words mean things, Slate, but home bakers deserve a little more sweetness.)

So it’s officially a buckle, because the fruit is laid on top of the batter and allowed to sink during baking, making it appear that the batter has buckled.

You’ll need plump, fresh blueberries and a pan that’s either 9×9 or 11×7 inches.

And whatever you end up calling it, I hope you enjoy.

1/2 cup (1 stick) unsalted butter, softened
1 1/3 cups sugar, divided
2 eggs
1 cup plus 1 Tbsp. all-purpose (plain) flour
1 tsp. baking powder
Dash of salt
1 heaping pint of blueberries
1 Tbsp. lemon juice
2 tsp. ground cinnamon

20180504_193503

Preheat oven to 350F/175C degrees. Grease a 9×9-inch or 11×7-inch baking pan and set aside.

In bowl, cream together butter and 1 cup sugar; blend in eggs. Stir in 1 cup flour, baking powder, and salt. Put mixture into prepared pan.

In a separate bowl, mix together blueberries, remaining 1/3 cup sugar, lemon juice, remaining 1 Tbsp. flour, and cinnamon. Spoon evenly over cake mixture. Bake 35 minutes, then let cool in pan and cut into squares.

Optional: Turn cooled cake upside down and dust with confectioner’s (icing) sugar.

Carrot Cake with Maple Cream Cheese Frosting

20180415_155748
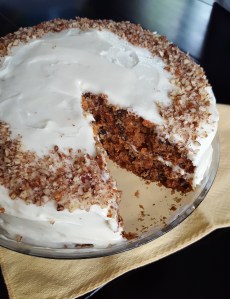
It’s hard to go wrong with carrot cake. Cream cheese frosting on top of a moist, cinnamon spice cake can be hard to resist. This version adds maple syrup to the frosting and uses pecans instead of walnuts. It’s easy to make, though grating the carrots and chopping the nuts takes a little extra time. Try doing those a day or two beforehand so you can have all the ingredients in place when you’re ready to bake.

You can also make these into cupcakes. The recipe will yield a little more than two dozen in standard-size muffin tins.

Cake:
2 cups all-purpose (plain) flour
2 tsp. baking soda
1 tsp. salt
1 tsp. ground cinnamon
2 cups sugar
1 1/4 cups vegetable oil (canola or sunflower oil if possible)
4 large eggs
3 cups peeled grated carrots (1 lb.)
1 1/4 cups coarsely chopped pecans
2-inch piece of ginger root, peeled and minced

Frosting:
10 oz. cream cheese, room temperature
5 Tbsp. unsalted butter, room temperature
2 1/2 cups powdered (icing) sugar
1/4 cup pure maple syrup

For the cake:
Preheat oven to 350F/175C. Butter two 9-inch round cake pans. Cut two circles of parchment paper to fit the bottom of the pans. Butter and flour the paper, then place in the pans.

In a medium bowl, whisk flour, baking soda, salt, and cinnamon to blend. In a large bowl, whisk sugar and oil until well blended. Whisk in eggs one at a time. Add flour mixture and stir until blended. Stir in carrots, pecans, and ginger. Divide batter between prepared pans.

Bake cakes until tester inserted in center comes out clean, about 40 minutes. Cool cakes in pans 15 minutes. Turn out onto racks. Peel off paper and cool completely.

(For cupcakes, line muffin tins with paper cups. Fill each about 2/3 full with batter and bake about 18 minutes or until toothpick inserted in center comes out clean. Leave in pan for about 5 minutes, then let cool completely on wire racks.)

For the frosting:
Using electric mixer, beat cream cheese and butter in large bowl until light and fluffy. Add powdered sugar and beat at low speed until well blended. Beat in maple syrup. Chill until just firm enough to spread, about 30 minutes.

Place one cake layer on platter. Spread with about 3/4 cup frosting. Top with second layer, then spread remaining frosting on top and sides.

20180414_113042As you can see in the picture, I decorated the top with finely chopped pecans sprinkled carefully in a ring along the edge. Another idea is to leave the sides unfrosted and simply use more of the frosting on top. Placing pecan halves on top is another easy way to decorate.

I have a picture in my binder of a carrot cake with orange fondant carrots on top. I’ve always wanted to try that. Seems easy enough — just roll the fondant into little carrot shapes, place on the cake, and squirt some thin green frosting at the top of each one for the leaves. If I ever get around to making those, I’ll post the picture here!
Continue reading

Rainbow Birthday Cake

rainbow birthday cake
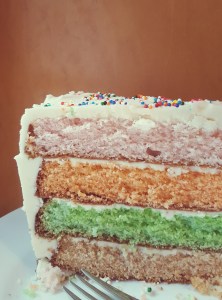
Here’s a way to dress up a white cake for special occasions. The layers are colored and the frosting is white, so when slices are cut it’s the inside that stands out.

I was inspired by a picture I clipped from a magazine ages ago that showed four layers in graduating shades of blue. There was no recipe, if I recall — just the picture. But it was easy to copy using my existing recipes for white cake and buttercream frosting.

My son requested this cake for his birthday with four layers, each in one of our favorite colors. That was orange, green, red, and pink. I can foresee making this on holidays — shades of red and pink for Valentine’s Day, pastel colors for Easter, or red, white, and blue (maybe with another layer of white containing sprinkles?) for Independence Day.

The white cake recipe above yields two 9-inch round layers. I made the recipe twice to get four layers. Each time I made the recipe, I divided the batter evenly into two large measuring cups and tinted them with gel colors before pouring into the baking pans.

I also doubled the buttercream frosting recipe above.

Now, you’ll see from the picture that the cake is missing the red layer my son requested and has a brown one instead. That one counts as a lesson learned. I decided to use some red beet powder as a natural red food coloring — I had used it before to tint frosting — but this time, the cake turned out the color of whole wheat bread. I looked it up and it seems that the baking process, and maybe a reaction to the baking powder, turned the red beet powder brown. Oh, well. I know for next time.

A note on the frosting: For this cake, you want the colored layers to stand out, so you shouldn’t put a lot of frosting between them. Put just a small amount to act as a glue to hold the layers in place. The thin ribbon of white you’ll see between each layer when you cut the cake is also just enough to show off the colors.

Chocolate Chip Cookie Cake

Forget any thoughts of those cookie cakes at the mall, because the only thing they have in common with this recipe is the name. Rather than looking simply like one big cookie (as delicious as that sounds), this is a cookie in a cake pan — thick and chewy in the middle with a crispy, buttery straight-sided crust. The slices could even be eaten with forks. (But don’t do that. Cookies are too much fun to be eaten with utensils.)

cookie-cake

The recipe comes from a recent issue of Southern Living magazine, where it was called a “skillet cookie,” baked in a cast-iron skillet. I swapped the skillet for a 10-inch springform pan, greased it well with butter, and followed the recipe as written.


If you ever want to serve cookies for dessert, this is how. And there will be no quibbling about who gets how many.

1 cup packed light brown sugar
1/2 cup granulated sugar
1/2 cup (4 oz.) butter, softened
1 large egg
3 Tbsp. whole milk
1 1/2 tsp. vanilla extract
2 cups (about 9 oz.) all-purpose (plain) flour
1 tsp. baking soda
1/2 tsp. salt
1 1/2 cups semi-sweet chocolate chips, divided

Preheat the oven to 325F (160C) degrees. Lightly coat a 10-inch springform pan with butter.

Beat brown sugar, granulated sugar, and butter with a mixer at medium speed until light and fluffy. Add egg, milk, and vanilla, beating until bended.

Whisk together flour, baking soda, and salt in a bowl. Add to butter mixture gradually, beating at low speed until combined.

20161012_190103

Add 1 cup of the chocolate chips, beating until combined.

Spread mixture evenly in prepared pan. Top with remaining 1/2 cup of chocolate chips.

Bake in preheated oven until golden and set, about 50 minutes. Let stand at least 15 minutes before cutting into wedges.

Cookie Monster Cake and Cupcakes


I made this cake for our son’s birthday as part of a Sesame Street-themed party. It was actually his “smush cake” — his own cake for grabbing and devouring and making a mess. The blue frosting got all over his hands and mouth and cheeks, which we all found fun and messy!

For the cake, I used this white cake in a 6-inch round pan. I also used one batch of buttercream frosting, tinted with numerous drops of blue food coloring (I lost count of how many drops I used, but it was around 20).

What I did first was make Cookie Monster’s eyes. I used a Wilton Sugar Sheet in black. It’s edible decorating paper and comes in all sorts of colors. You can punch out designs or make your own, then simply peel them off and stick it onto frosting.

I punched out two large dots of the sugar sheet using the wide circular end of a decorating tip for a frosting bag. I placed each dot on the bottom of a paper baking cup, peeled side up, right at the edge. Then I poured melted white chocolate on top, just enough to reach the edges of the cup, and let it cool. I used about 2 oz. of the chocolate, melted in the microwave for 30 seconds and then stirred by hand until it was fully melted.

After frosting the cake blue, I made Cookie Monster’s mouth with the black sugar sheet. I drew the mouth shape first on paper, then cut out the shape and put it over the cake to test what it looked like. I made several different cutouts until I got the shape and size I wanted. I put the paper on the sugar sheet and used the tip of a paring knife to cut around the paper. Then I carefully peeled the mouth shape off of the backing and laid it on top of the frosting. (Tip: Make a very large mouth. If it looks too large once it’s on the cake, you can always make it smaller by covering the edges with frosting.)

I then covered the cake in blue-tinted coconut flakes, sprinkling them over and lightly pressing them into the frosting. I left clear some space at the top for the eyes, so they could adhere to the frosting. I attached the now-hardened white chocolate eyes at the top edge, leaving part of them sticking out over the edge of the cake. I turned the black parts of the eyes in different directions to achieve Cookie Monster’s googly-eyed look.

Lastly, I put a “bitten” chocolate chip cookie on top of the black mouth. I used a knife to cut out a “bite” from the cookie, then laid the bitten cookie at the edge of the mouth and the bite of cookie inside the black to look like Cookie Monster was in the process of eating it. I had baked the cookies with Toll House pre-made cookie dough to save time. Whatever cookie you use, make sure the diameter of the cookie roughly matches the diameter of the eyes, or is even a tiny bit bigger, for the best dimensions.

To make the colored coconut flakes, put 1/2 cup of flakes in a zippered plastic bag. Dissolve a couple of drops of food coloring in 1/2 tsp. water, then add that to the bag, seal, and mash it around with your fingers until the coconut is evenly colored.

COOKIE MONSTER CUPCAKES Continue reading

Buttercream Frosting

This fluffy frosting is great for decorating cakes and cupcakes. Easily add color with food coloring.

It comes from the Hummingbird Bakery in London, where tray after tray of colorful cupcakes begin tempting you as soon as you walk through the door. It’s a wonderful but dangerous place for any sweet tooth.

Makes enough to frost 12 cupcakes (double the recipe to frost an 8-inch cake)

250g/8 oz. icing sugar (confectioner’s sugar), sifted
80g/3 oz. unsalted butter, at room temperature
25ml/just under 2 Tbsp. milk
a couple of drops of vanilla extract

Beat the sugar and butter together in a freestanding electric mixer with a paddle attachment (or use a handheld electric whisk) on medium-slow speed until the mixture comes together and is well mixed.

Turn the mixer to slow speed. Combine the milk and vanilla extract in a separate bowl, then add to the butter mixture a couple of tablespoons at a time.

Once all the milk has been incorporated, turn the mixer up to high speed. Continue beating until the frosting is light and fluffy, at least 5 minutes. The longer the frosting is beaten, the fluffier and lighter it becomes.

If adding food coloring, add just a couple of drops at a time and mix well until you achieve the desired color.

White Cake

This is the perfect recipe for a cake you want to cover with frosting and decorate. It’s easy and delicious, but the flavor of the cake stays enough in the background so you can highlight the sweet frosting on top. (See this recipe for a good buttercream frosting here.)

I used this as the base for the Cookie Monster Cake. This recipe is for a double-layer 8- or 9-inch round cake. Halve the recipe for a single-layer cake of the same diameter, though I used half in a 6-inch round cake pan and it turned out well.

I clipped this recipe years ago from the newspaper. It said it won an award at the 1997 Boulder county fair for a woman named Jan Bentley. I feel I ought to give her credit for such a delicious creation!

2 1/4 cups all-purpose (plain) flour
1 1/2 cups sugar
1 tsp. salt
1 Tbsp. baking powder
1/2 cup vegetable shortening
4 egg whites
1 cup milk
2 tsp. vanilla extract

Preheat the oven to 375F/190C degrees. Grease and flour two 8- or 9-inch round cake pans.

In the bowl of an electric mixer, combine flour, sugar, salt, and baking powder. Blend in shortening with a pastry blender until the mixture resembles coarse meal.

In a separate bowl, mix egg whites, milk, and vanilla. Add liquids slowly to the flour mixture and mix by hand, scraping the sides of bowl, until blended. Beat with the mixer on medium speed for 2 minutes.

Pour batter into prepared cake pans and bake 25-30 minutes until tops are golden and toothpick inserted in center comes out clean. (Don’t worry if the top is turning dark and you’re still waiting for the toothpick to come out clean, because you’ll slice off the top later.)

Cool in pans for 10 minutes, then remove and place on wire racks until cool completely, about 2 hours.