Red Curry Chickpeas and Kale

This is an easy and super-healthy side dish that also works well as a main, especially if you’re a veggie lover like me. Serve it with soft, warm naan bread and a squirt of fresh lime.

Serves 4-6

Olive oil
1 1/2 cans of chickpeas, rinsed and patted dry
4 garlic cloves, minced
1 lb. pre-cut and washed kale leaves
2 Tbsp. Thai red curry paste
Salt
1 lime, cut into quarters

Heat about 1 tsp. olive oil in a pan over medium-high, then cook the chickpeas until they’re crisp, about 5 minutes. Set aside.

In a Dutch oven over medium-high, saute the garlic until fragrant, then add the kale and stir. You may need to cook the kale in batches, letting the leaves wilt before adding more. Have a cup of water nearby and add some if the kale gets too dry as it cooks down.

Add the curry paste and stir, adding a little more water so the kale is neither too dry nor too wet. Cook until the curry paste is incorporated and all the leaves are bright green and wilted. Add the chickpeas and salt to taste.

Serve with warm naan bread and lime wedges.

Adapted from Food Network magazine.

Tostadas

I made these with my son the other night (he did most of the work!) and they were absolutely delicious. Everyone got two, and we served them with Mexican Tomato Soup. These are easy to make and fun to eat, too.

5 cups cherry tomatoes, cut in half
1 cup canned and drained corn
2 Tbsp. vegetable oil
1 tsp. chili powder
1/2 tsp. salt
1 cup refried beans
8 6-inch corn tostadas
1 cup crumbled queso fresco
1/2 cup fresh cilantro leaves (coriander), whole or chopped

Heat oven to 400F/200C degrees.

In a medium bowl, mix tomatoes, corn, oil, chili powder, and salt. Spread it in a large baking pan and bake until the tomatoes are soft, 20-25 minutes.

Spread refried beans on the tostadas and place them on foil-lined baking sheets. When the tomato mixture is done baking, spoon it evenly on top of the tostadas. Place in oven until the beans are warm, about 5 minutes.

Remove from oven and sprinkle the cheese and cilantro on top. Serve immediately.

The recipe is from “The Complete Cookbook for Young Chefs,” published by America’s Test Kitchen.

Poached Eggs

Making classic poached eggs is much less complicated than it may seem, and they turn out beautifully. Compared to the microwave method — which I still use sometimes, because it’s faster — this method makes eggs that are less dense and look like little clouds on your plate, which I just love.

  1. Add about 2 tablespoons of white vinegar to 4 inches of water in a deep pot. The vinegar helps the whites to coagulate. Bring the water to a simmer.
  2. Break the eggs quickly into the simmering water so they will all cook for about the same length of time.
  3. When all the eggs are in, hold a slotted spoon parallel to the surface and move it over the top of the water, which will keep the eggs from sticking to the bottom. Cook about 3 1/2 minutes or until the whites are firm.
  4. Remove the eggs with the slotted spoon. Put in cold water for a few seconds to stop the cooking and remove the vinegar.
  5. Put the eggs on a kitchen towel to soak up the water. Trim off any loose whites. Serve immediately.

This is the first recipe I have in the “breakfast” section of my binder, which means it must have been one of the first I clipped from the paper, sometime in the ’90s. It’s originally from a book called “Cooking Techniques” by Beverly Cox.

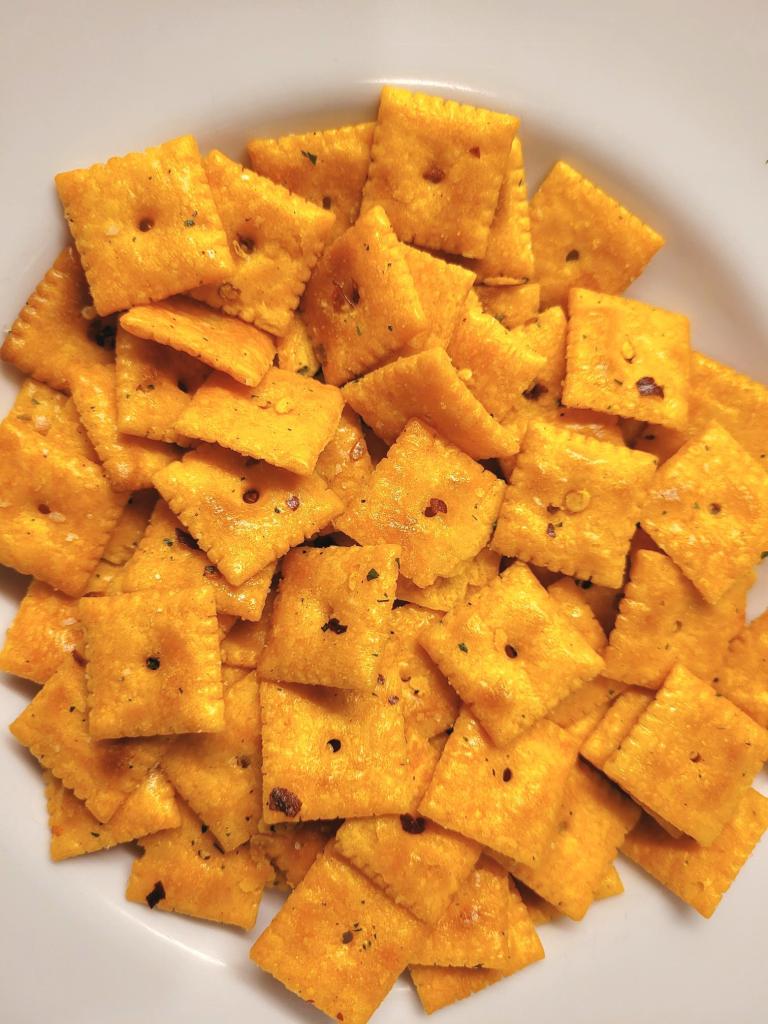
Party Cheez-Its

Boost the flavor of Cheez-Its with ranch seasoning in this delicious party snack. Store it in the freezer, but it’s so yummy that I guarantee it won’t last long.

Cheez-Its aren’t sold outside the United States and Canada, though you can get them online. If you can’t find ranch seasoning packets, you can make your own — here’s one recipe.

3/4 cup canola oil
1 package ranch seasoning
4 tsp. red pepper flakes
2 7-oz. boxes of original Cheez-Its

Mix the first three ingredients well in a large bowl. Add the Cheez-Its, then stir with a spatula until absorbed. Leave them for 10 minutes, then stir again, and do that twice more. Store in 1-gallon bags in the freezer.

Butterscotch Chip Cookies

The addition of a little cocoa powder in this recipe is what makes it. These butterscotch cookies don’t taste chocolatey, but the cocoa powder gives it a little something extra in the background. The cookies come out very soft, thanks to the two kinds of brown sugar.

It took me 15 years to get around to making these! The recipe is from a magazine and I kept the whole page loose in my cookbook this whole time, always finding an excuse to make something else, even though the picture looked really good. But it was the picture that grabbed my daughter’s attention when we were looking for a cookie recipe to make together, finally prompting me to try it — and we all loved the result.

3 cups all-purpose (plain) flour
1 tsp. baking powder
1/2 tsp. baking soda
1/4 tsp. salt
2 Tbsp. unsweetened cocoa powder
1/2 cup packed dark brown sugar
1/2 cup packed light brown sugar
1/2 cup granulated sugar
1 cup butterscotch chips
3/4 cup butter, melted and cooled
3 eggs
1 Tbsp. vanilla extract

Heat oven to 350F/175C degrees. Grease baking sheets.

In a large bowl, mix the dry ingredients and the butterscotch chips. In a small bowl, mix the butter, eggs, and vanilla extract, beating just a little bit to incorporate the eggs; pour this into the dry ingredients and stir until just combined.

Drop dough by rounded spoonfuls onto the baking sheets, then bake for 12-13 minutes or until firm. Immediately remove to wire racks and let cool.

Homemade Croutons

My son’s latest cooking success are these croutons, which are easy and quick to make. They will dress up any salad, especially one like a spinach salad that may need more crunch, and they are deliciously garlicky. Make them with any good bakery bread — the original recipe called for pumpernickel, but we used a loaf of brioche the last time and it was fantastic.

3 cups cubed or torn bread, such as pumpernickel, brioche, or Italian
2 Tbsp. butter
1 garlic clove, minced
Kosher salt and black pepper to taste

Heat oven to 400F/200C degrees. Put butter and minced garlic in a microwave-safe dish and heat until melted. Spread bread pieces on a baking sheet, drizzle with butter mixture, and toss to coat. Bake 8-10 minutes or until nicely toasted. Remove from oven and sprinkle with salt and pepper.

Chocolate Pudding

This homemade pudding is so supremely chocolatey and rich that it’s like a luxury dessert, even though it’s easy enough to make for a quick weeknight dinner. It could be a great last-minute dessert if you suddenly need to prepare one.

I made it on a whim this weekend because I wanted to use up some milk — this recipe is a good way to do that, or to use up leftover egg yolks. Dress it up with cookies or whipped cream, and you may very well have some chocolate mustaches at the table because people will have gobbled it up so quickly!

They key here is constant stirring, patience, and using a sieve at the end to ensure the result is silky smooth.

The original recipe is from Martha Stewart.

Serves 4

2/3 cup sugar
1/4 cup cornstarch
1/4 tsp salt
1/3 cup unsweetened cocoa powder
2 1/2 cups milk
4 large egg yolks
2 Tbsp. unsalted butter, cut into pieces
1 tsp. vanilla extract

Place a fine-mesh sieve over a medium bowl; set aside. In a medium saucepan, off heat, whisk together sugar, cornstarch, salt, and cocoa powder. Very gradually (a few tablespoons at a time) whisk in milk, taking care to dissolve cornstarch. Whisk in egg yolks.

Whisking constantly, cook over medium heat until the first large bubble forms and sputters. Reduce heat to low, still whisking, and cook 1 minute. Note that when the pudding thickens, it will happen quickly.

Remove from heat and immediately pour through the sieve into the bowl. Stir butter and vanilla into the hot pudding.

Place plastic wrap directly on the surface of the pudding (to prevent skin from forming); chill at least 3 hours and up to 3 days. Before serving, whisk pudding until smooth and divide among four serving dishes.

Key Lime Pie

I don’t remember the first time I had key lime pie, but I do remember exactly where I got this recipe: from an in-flight magazine at least 20 years ago. It was at the end of a two-page article in which author Ellen Kanner describes savoring real key lime pie as she was growing up. I taped the two pages together, punched holes on the side, and have kept it in my binder ever since.

Kanner described how key lime pie should be “tangy and sweet, bracing and cool, the crunch of the crust a perfect foil for the creamy filling.” And, of course, it must be yellow. Key limes are light yellow when they’re ripe — not green — so their juice is, too.

Some people garnish their pies with strips of green rind from regular limes, which I find OK, but I’d rather just have just a dollop of whipped cream. There is way too much flavor going on with the pie for me to want much more than that. I just want to dig in!

I do recommend making the graham cracker crust yourself. Although you can certainly use a prepared one, a homemade crust looks and tastes better, and is a lot easier to make than you might think. In just a few steps, you’ll have a buttery, crisp, delicious pie crust. (If you do use a store-bought crust, make sure it’s for a 9-inch pie — some are 10 inches and that’s too large.)

The ingredients here are the same as those in the magazine article from so many years ago, though I recently tweaked it to make the pie hold up better.

Graham cracker crust:

1 1/2 cups graham cracker crumbs
1/4 cup sugar
1/3 cup butter, melted

Combine all ingredients in a large bowl and press firmly into a 9-inch pie plate. Bake at 350F degrees for 10 minutes. Remove and let cool while you prepare the filling. Keep oven on.

Key lime pie filling:

4 egg yolks
1 14-oz. can sweetened condensed milk
1/2 cup + 1 Tbsp. key lime juice

With an electric mixer (not by hand!), beat the egg yolks until lemony*. Add the condensed milk and continue beating for about 3 minutes. Add the key lime juice and beat until slightly thickened, about 2 minutes. Pour into prepared pie crust and bake at 350F for 10 minutes. Remove, let cool, and refrigerate at least 6 hours before serving.

*What does “lemony” mean when beating egg yolks? It refers to the way the color of the yolks changes slightly and becomes yellower when they’re beaten. Egg yolks — along with whole eggs and egg whites — hold air bubbles well; the air that’s incorporated when you beat yolks makes them lighter in color.

Taco Soup

This is a perfect summer soup. It doesn’t take long to cook on the stove, it’s easy, and it’s adaptable. If you want to make it more of a scoopable dish with taco shells, use less water. More of a soup, add more broth. You can make it spicier, or add dried herbs like oregano.

We enjoyed this with lots (and lots!) of chips for scooping. The original recipe comes from Delish, but I altered the seasonings here.

Serves 4-6

1 Tbsp. canola oil 
1 large onion, chopped
2 lb. ground turkey
1 15-oz. can pinto beans, drained and rinsed
1 15-oz. can corn, drained
1 15-oz. can chopped fire-roasted tomatoes, with liquid
1-2 Tbsp. (1-2 packets) taco seasoning
1 1/2 cups water
1 Tbsp. chicken bouillon powder
Freshly chopped cilantro, for garnish

In a large pot over medium heat, heat oil. Add onion and cook until soft and translucent, then add ground turkey and cook until no longer pink.

Add beans, corn, fire-roasted tomatoes, taco seasoning, water, and bouillon powder. Bring to a simmer and cook until all ingredients are heated through. Add more water (or even chicken broth!) if desired to make it more of a soup.

Taste for seasonings and add salt if needed; serve in bowls with chopped cilantro sprinkled on top.

How to peel peaches

To use fresh peaches for a recipe, whether fruit salad or a dessert like peach cobbler, you’ll probably want to remove the skin first. You could use a vegetable peeler, but this is just as easy and gives you perfect results!

  • Score an X on the bottom of each peach. (This will help you slide off the skin later.)
  • Drop them into boiling water and cook for 30 seconds.
  • Remove with slotted spoon and put in a bowl of ice water to stop the cooking.
  • Peel off the skin.

It’s best to do them individually so you can cook each one for exactly 30 seconds.